

How To Draw An Elephant Face Step By Step Easy
In this easy-to-follow drawing tutorial, nosotros take y'all step-by-step through the process of creating a realistic elephant sketch. These large and peaceful animals stroll through the pastures and plains of Africa, and you tin can at present bring them into your home with this fun and easy elephant drawing.
Tabular array of Contents
- 1 A Step-by-Step Tutorial to Help You Draw an Elephant
- 1.1 Step one: Constructing the Main Body Shape
- 1.two Step two: Creating the Shape of the Caput
- one.3 Step 3: Shaping the Trunk of Your Elephant Cartoon
- 1.iv Step four: Outlining the Tusks
- 1.5 Pace 5: Creating the Ears of Your Elephant Drawing
- one.6 Stride 6: Joining the Head and Torso
- one.7 Step seven: Drawing the Elephant's Tail
- 1.8 Step 8: Mapping the Front Legs of Your Elephant Sketch
- 1.9 Footstep 9: Shaping the Dorsum Legs
- 1.ten Stride ten: Creating the Final Outline of the Easy Elephant Cartoon
- 1.11 Step eleven: Adding Texture to the Skin of Your Elephant Drawing
- 1.12 Step 12: Painting the Base of operations Colour Glaze
- 1.13 Stride 13: Calculation the First Layer of Shading
- 1.14 Footstep 14: Increasing the Shading
- i.xv Footstep 15: Adding Highlights to Your Elephant Sketch
- 1.16 Step 16: Finishing Your Like shooting fish in a barrel Elephant Drawing
- ii Frequently Asked Questions
- 2.1 How do You Learn How to Draw an Elephant?
- ii.2 Is Information technology Difficult to Describe an Elephant Face up?
A Pace-by-Step Tutorial to Help You Describe an Elephant
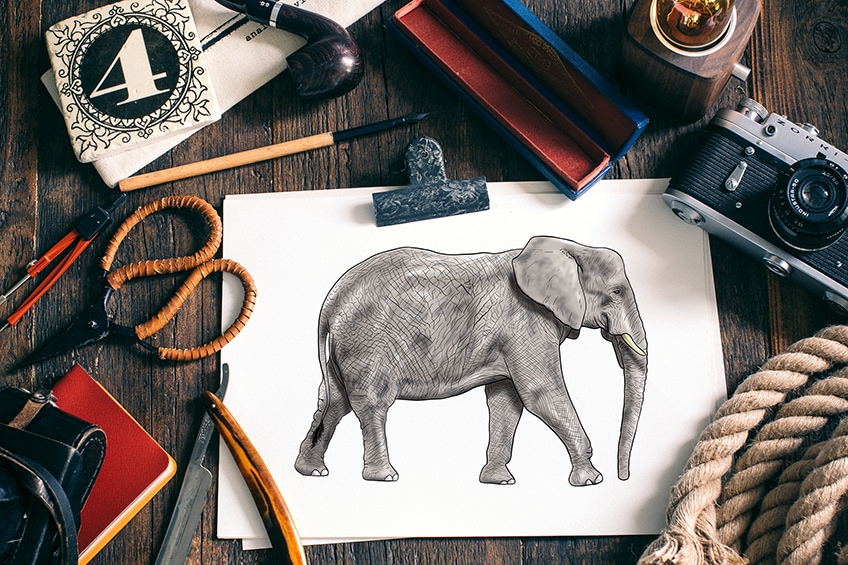
Follow along with our easy elephant cartoon tutorial and acquire how to create a realistic elephant sketch like the one below in just 16 easy steps! During this tutorial, we will take a look at all of the basic elements of how to depict an elephant, create textural detail, and terminate information technology with a realistic color coat that includes highlights and shadows.
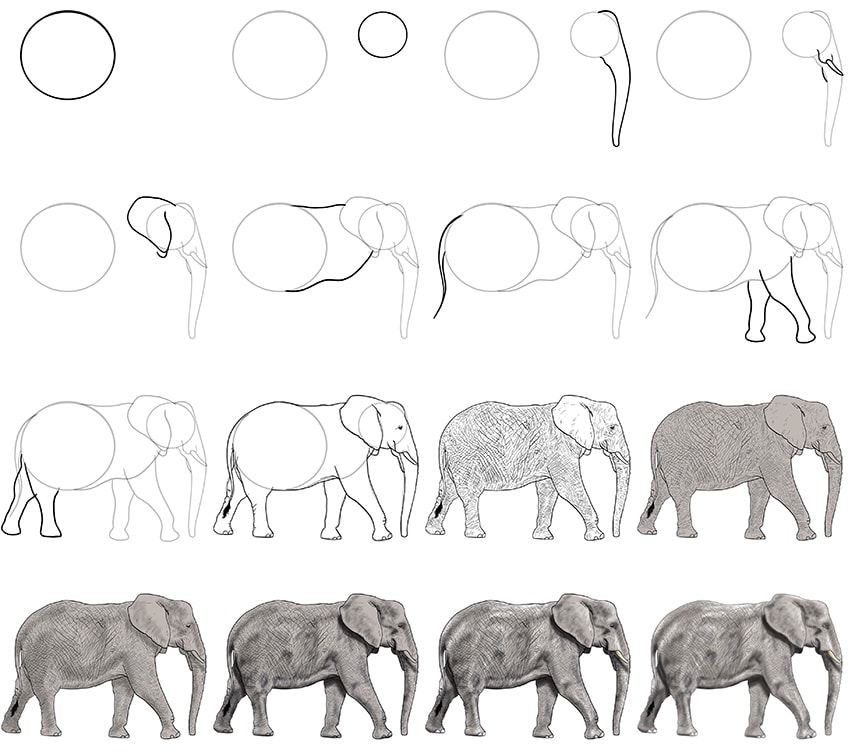
At this betoken, before nosotros even begin, you may exist wondering where to offset with creating an elephant drawing. How tin can nosotros peradventure bring this beautiful and complex creature to life on paper? We brainstorm to construct the shape of the elephant sketch past using a diversity of different construction shapes and lines. These construction shapes help usa to lay down the basic shape of the elephant drawing earlier we create the final outline and add details and textures.
You can run across a brief outline of the tutorial below.
For the final five coloring steps, we have used paint to create the highlights and shadows, just you are welcome to use any medium you choose. If you are a graphic artist who prefers to use a drawing tablet, or yous dear to use coloring pencils or pastels, you can easily adjust the coloring steps to accommodate your needs.
In one case you accept gathered your cartoon supplies, settle down somewhere comfortable, and let us begin learning how to depict an elephant!
Step ane: Constructing the Main Body Shape
We begin our piece of cake elephant drawing by drawing a large circle that will represent the dorsum portion of the primary trunk shape. Using a soft and hands erasable pencil, draw this large circle within the left quarter of your canvas.
Ensure that there is plenty of space all around the circle, particularly below it and backside it for the legs and tail of your elephant sketch.
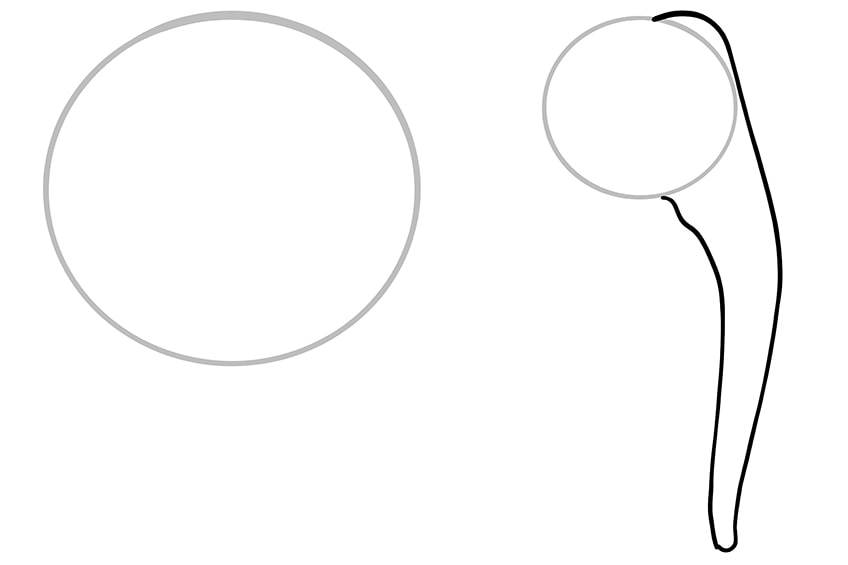
Step 2: Creating the Shape of the Head
To lay the foundation of the elephant's caput, y'all are going to employ another, smaller circumvolve shape. Place this circumvolve on the right side of your canvas, in line with the top of the chief body circumvolve. The caput circle should be a niggling way abroad from the chief body circle.
Remember to not place this caput circle on the very right of the canvass, instead, leave a little infinite for the body and face.

Footstep 3: Shaping the Body of Your Elephant Cartoon
This third step is a piffling more freehand than the previous two. We are going to draw the bones shape of the trunk, curving downward from the tiptop of the head circle. Begin by drawing a small upwards curving line from the right upper side of the head circle. Take this line downwards close to the side of the caput circle, before curving it forwards and so backward and down to class a curved end. Yous tin so curve this torso shape support to join the bottom of the head circle.
The inside of the body shape should be wider at the superlative and narrower at the bottom.
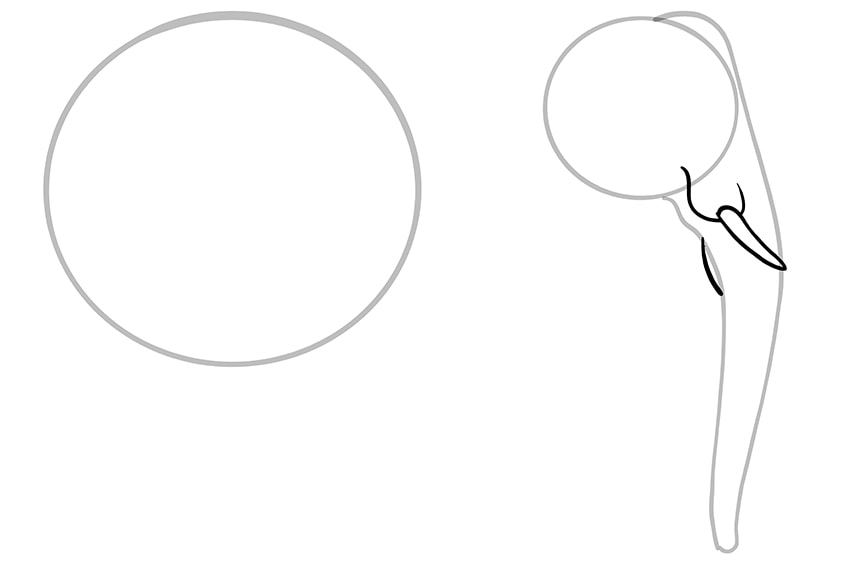
Footstep 4: Outlining the Tusks
In this step, you are going to draw the base of operations shape of the tusks extending downward from inside the caput circle into the top of the trunk. From the base of this tusk shape, draw a sharply curving forward tusk that ends on the border of the trunk shape. This volition create a realistic rooted shape for the tusk. From our perspective, the 2nd tusk on the other side of the elephant's body volition be mostly obscured by the trunk.
As such, to give a brief glimpse of this other tusk, draw a minor curved shape at the back of the tusk.
Step 5: Creating the Ears of Your Elephant Drawing
In this step, yous are going to create another freehand element for your elephant cartoon, namely the ears. The ears are an essential part of the elephant face up drawing. Begin by drawing one massive ear first with a line from the top of the caput, where the trunk begins. Take this line up and back, before curving it down towards the bottom of the head circle, and then back up into the caput circle. For the other ear, describe a small curve below the bottom of the offset, every bit this volition be mostly hidden on the other side of the elephant's caput.
The elephant's ear should await a little like the fly of a butterfly.

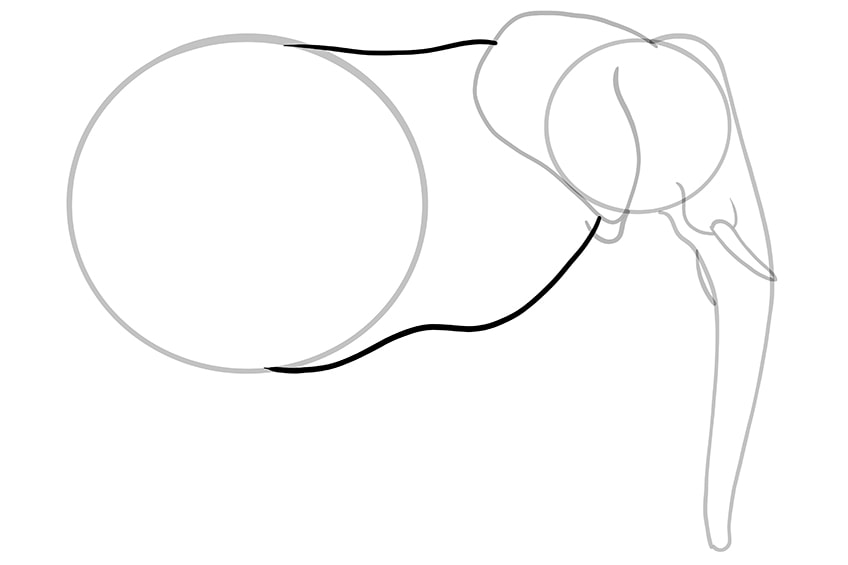
Step 6: Joining the Head and Torso
Now, we are going to attach the head circle to the main trunk circumvolve with the front body. Begin with the pinnacle of the elephant's torso, taking a short line from the back of the ear to the top of the master torso circle. For the bottom of the torso, accept a line downwardly from the lesser of the large ear.
You can then bend it down and back, creating a small hump, earlier joining it to the bottom of the primary body circumvolve.
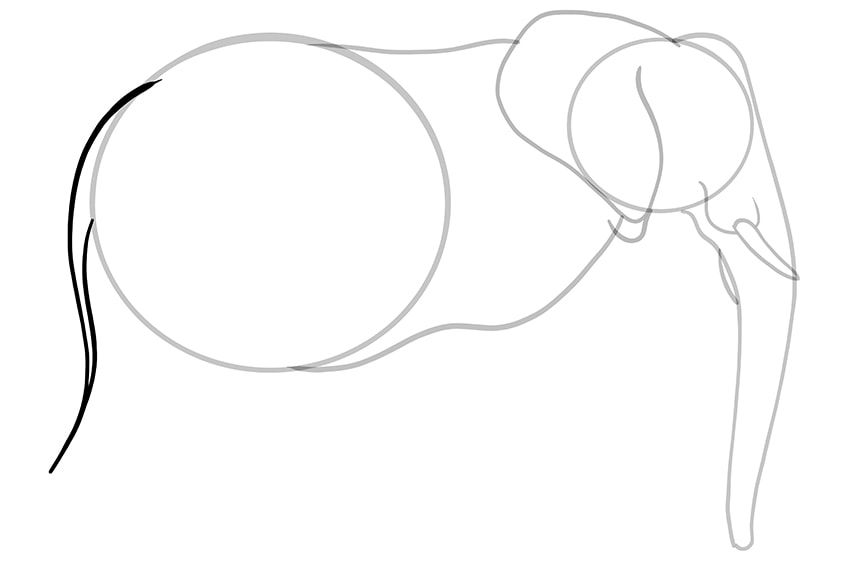
Step 7: Drawing the Elephant'south Tail
This is a quick and easy step, all you need to do is create the shape of the tail. Begin past drawing the acme line of the tail start, commencement on the top correct side of the main trunk circumvolve from step 1. Follow the curve of this circle, and and so curve in the other way, ending at a sharp signal.
To finish this step, bring the line back up to come across the master body circle, simply below the halfway point on the left side.
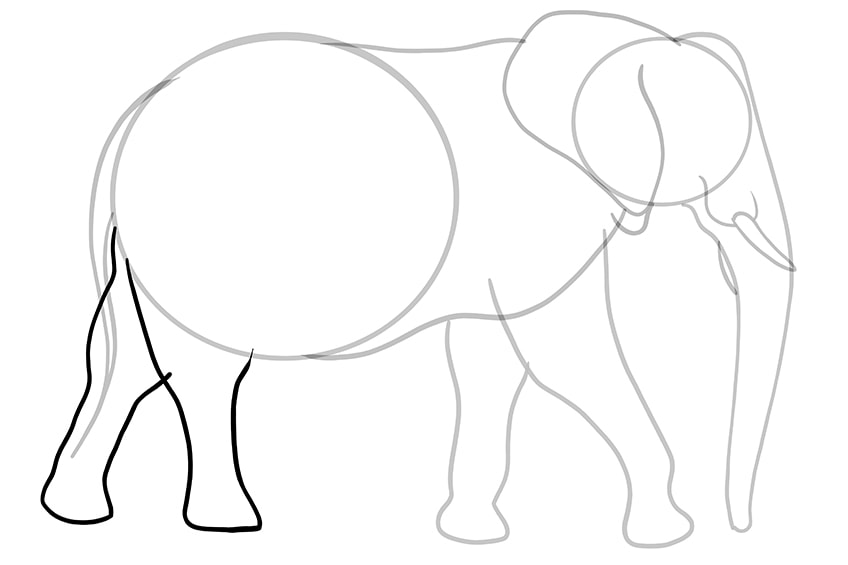
Pace 8: Mapping the Front Legs of Your Elephant Sketch
In this step, you are going to create the bones shape of the elephant's two front end legs. It is important that we ensure that we have the correct scale for the legs, equally an elephant is a very big fauna and the legs need to exist in the correct proportion. It is also important to note that as we are creating an elephant cartoon from the side-on, ane of the legs is going to be slightly obscured from our view. Allow us begin with the leg that is closest to u.s. from this perspective. This get-go front leg should exist angled slightly forwards in a motion of walking. Begin by drawing a line that extends down from just inside the neck area below the ears.
Curve this line forrard and down, and then create a pocket-sized foot shape, before bringing the leg line dorsum up into the front torso shape.
For the second leg, brainstorm the front line on the back line of the showtime leg, creating a leg that extends straight down and ends with a foot shape.

Footstep ix: Shaping the Back Legs
You are now going to repeat the process from the concluding footstep to create the back legs of your elephant drawing. Brainstorm with the leg that is fully visible to u.s.. Accept the front end line down from the bottom of the main body circumvolve, and create a foot shape in line with the ii forepart legs. And then bend this line back up and back to join the back of the principal body circle, simply below the lesser of the tail. For the very back leg, y'all are going to angle it slightly to the dorsum. Take the backline of this leg down from the signal where the tail meets the chief body circle, curve it back, create the human foot, so join the back leg to the backline of the kickoff leg.
This positioning of the legs gives the impression of motion within our elephant sketch.
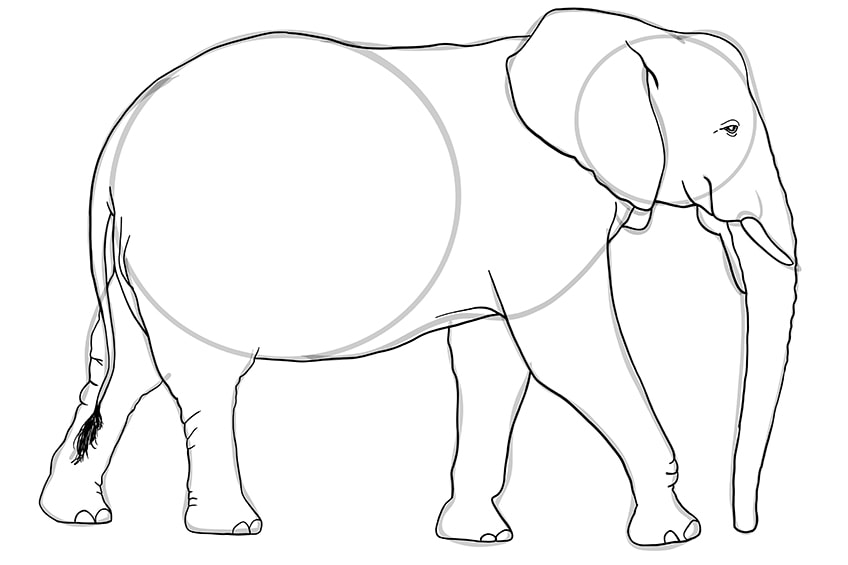
Stride 10: Creating the Final Outline of the Easy Elephant Drawing
The construction steps take come up to an end, and it is now fourth dimension to use all of these lines and shapes to form the last outline of your elephant sketch. Begin with the elephant face drawing, calculation an almond-shaped eye detail just higher up the torso. Y'all tin can and so go along to outline the balance of the elephant face up drawing, including the tusks, ears, and trunk.
Continue your outline down the trunk of the elephant sketch, following the construction lines closely.
When you get to the legs, create some small-scale wrinkles around the joint areas and add ii semi-circular toes on each pes. On the back of the rear legs, add a few more creases to create a realistic upshot. When information technology comes to the tail, you want the tail to extend over the very back leg for a three-dimensional effect. When you go to the end of the tail, use some long curving strokes to create a furry terminate.
When y'all have completed your outline, you can erase the remaining outlines.
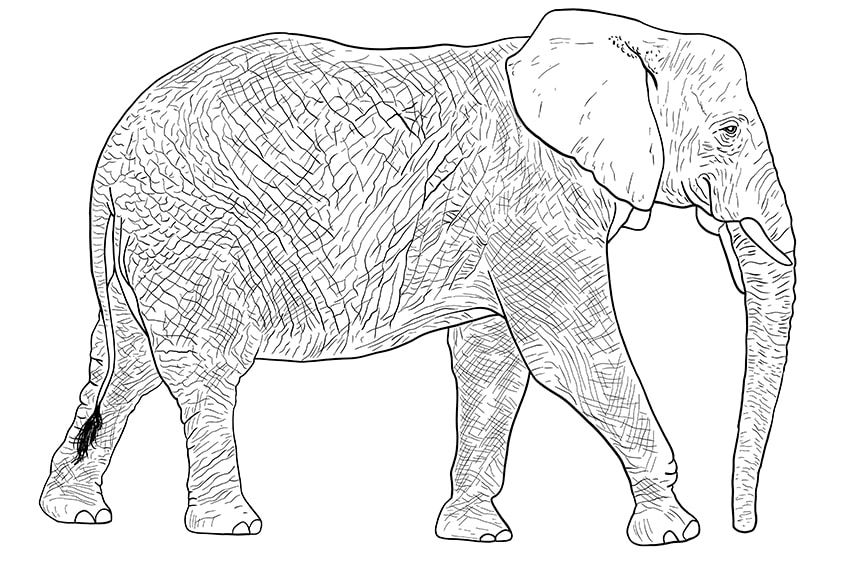
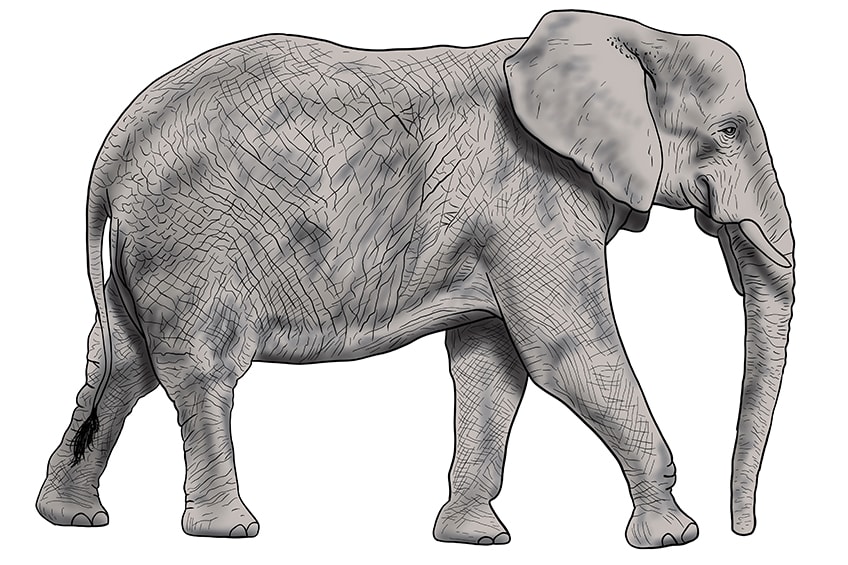
Step 11: Adding Texture to the Peel of Your Elephant Drawing
In this step, you are going to create the texture of the elephant's body, creating the impression of wrinkly and folded skin patterns. This pace may have a fiddling time, but the patience will be well worth it in the final issue. Brainstorm within the head, using a combination of short and long lines to create texture on the face and down the trunk. Add a few trivial textural lines within the ear, but exercise not overdo it.
Make sure that these lines follow the curve of the outline.
Every bit you move onto the body, you lot can begin to draw lines throughout the trunk that criss-cantankerous over each other. In the centre of the torso, the gaps betwixt these lines tin become a little larger, while those on the legs and around the border of the outline should be smaller. Take your time to do this, and try to brand the pattern ununiform to be as realistic as possible.
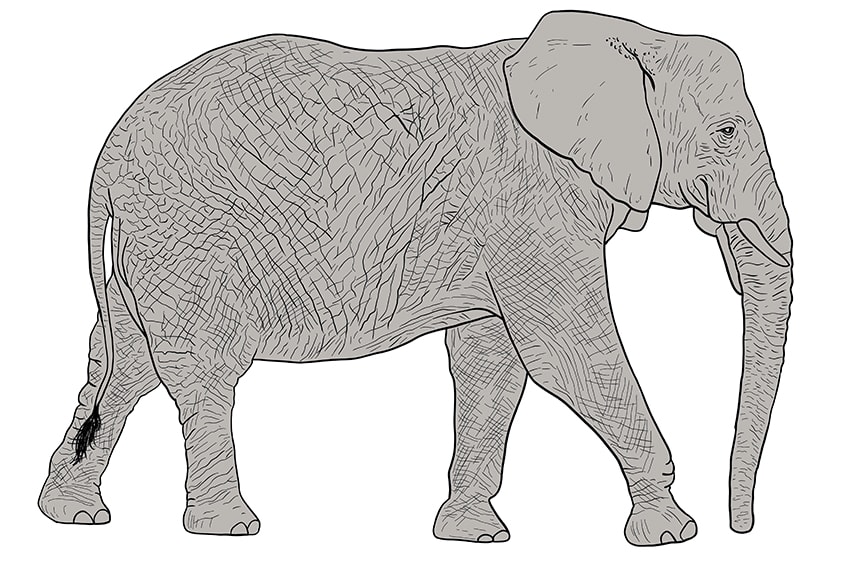
Footstep 12: Painting the Base Color Coat
You may look at an elephant and think that they are only a single color, but in that location is a neat bargain of variation in tone and shade throughout the body. We brainstorm building the realistic coloring of the elephant drawing by laying down a base color. Find a darkish gray shade, and utilize a regular brush to make full the entire body of your elephant sketch.
Make sure that this coat is even and not blotchy in whatsoever identify.
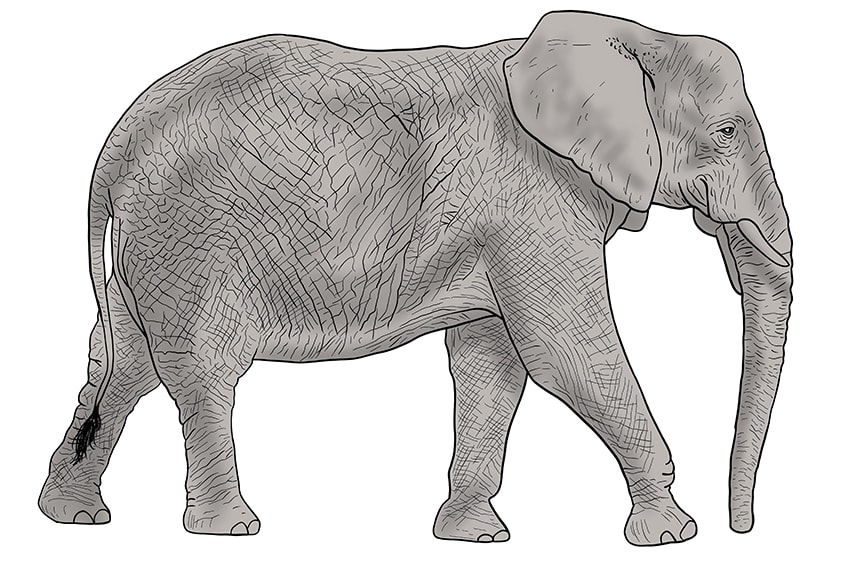
Stride 13: Adding the First Layer of Shading
Nosotros are at present going to add together a little more than structure to the shape of our easy elephant drawing by calculation some shadows. Detect a soft blending brush, and utilize a bear upon of black pigment to profile the structure of the elephant. Focus the color around the top of the face up, on the top of the trunk, below the trunk, under the belly, effectually the edges of the master body circumvolve, and on the insides of the legs.
This offset layer of shading can be quite lite and not besides specific, as, in the next step, we are going to increment the shadow in some of these areas, which will help us create a smoother blend.
Footstep xiv: Increasing the Shading
Now, you can use a medium-sized brush and a little more black paint to create smaller areas of darker shading inside the previous layer. This volition help you give your elephant drawing a more defined structure.
Find the central points of your previous shading, and darken them e'er-so-slightly.
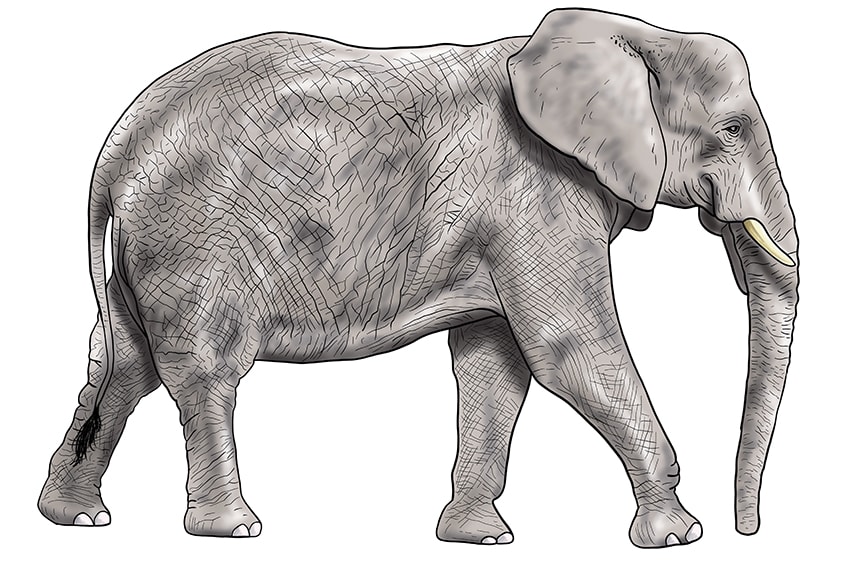
Step 15: Adding Highlights to Your Elephant Sketch
To contrast the shading you simply created, you lot are at present going to utilise white to highlight other areas of your elephant cartoon. Use a pocket-size blending brush and some white paint to highlight the edges of your elephant sketch.
Imagine that there is a light source towards the front end of your elephant, and add together this white highlight to whatever points that would stand out and catch the light.
On the toes of each foot, add white paint. To end this step, you lot can color in the tusks with a low-cal yellow shade, and then add a bear on of highlight around it.
Step xvi: Finishing Your Piece of cake Elephant Drawing
In this step, you are going to put the finishing touches to your elephant sketch, to create a seamless and realistic concluding production. Brainstorm by using a precipitous brush and white to add a glint to the eye of your elephant. Next, use the respective color at each signal of the outline, to trace over it.
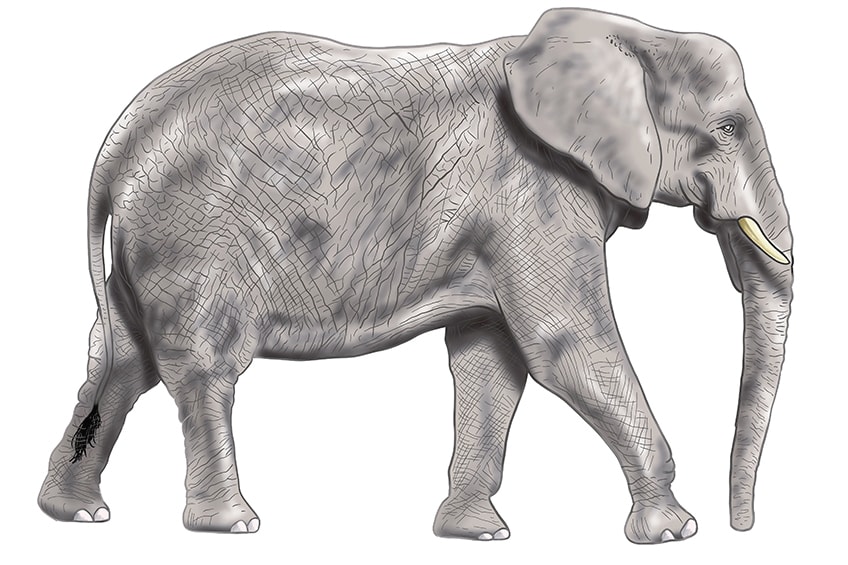
Congratulations on finishing your very own realistic elephant sketch! We hope that y'all have enjoyed the drawing process, and more than importantly, that you lot are happy with your last elephant drawing.
We've also created a short elephant cartoon google webstory.
Frequently Asked Questions
How do You Learn How to Draw an Elephant?
When you offset approach learning how to describe an elephant, information technology may seem similar an intimidating chore. Luckily, our easy-to-follow elephant sketch tutorial makes the process piece of cake, then that you lot can create your ain realistic elephant drawing in only 16 like shooting fish in a barrel steps!
Is Information technology Difficult to Draw an Elephant Face?
From the side on, the only office of the elephant'south face that nosotros actually need to draw is the eye. The torso and tusks are also parts of the face, and nosotros show you how to create an like shooting fish in a barrel and realistic elephant face up drawing in this tutorial."

Source: https://artincontext.org/how-to-draw-an-elephant/
Posted by: mcgowanwhoust.blogspot.com
0 Response to "How To Draw An Elephant Face Step By Step Easy"
Post a Comment