

How To Draw Phylogenetic Tree On Word
>Decision trees have the emotion out of controlling and put the focus back on the data then you can brand wise choices for your business organization or organisation. Many people turn to Microsoft Word to create a decision tree so they tin can pair information technology with other documentation and easily share information technology with their teams. Merely Word is great for writing and maintaining piece of work documents, its diagramming features are limited.
To make this process easier, follow our step-by-step guide to quickly insert a professional conclusion tree using Lucidchart's Microsoft add together-in or manually make a decision tree inside MS Word.
Use Lucidchart to easily add together a decision tree to Word
Employ Word to manually make a determination tree
Option #ane: Employ Lucidchart to add a conclusion tree in MS Give-and-take
Avert the frustration that comes with diagramming decision trees in Discussion, and use Lucidchart's integrations with Microsoft Office to build and insert diagrams correct into your document.
Before you lot decide to resign yourself to making a determination tree in Give-and-take, give Lucidchart'due south free add-in with Word a shot. The easy-to-use diagramming tools, comprehensive shape library, and variety of templates make it simple to add a sharp, professional decision tree to your certificate in a few quick steps. If y'all demand boosted help, cheque out our step-by-footstep guide to learn how to brand a decision tree.
Not yet a Lucidchart user? Start your gratis business relationship now.
How to install the Lucidchart add-in for Give-and-take
To get-go, you'll need to download the Lucidchart add-in for Give-and-take. Just follow the steps below:
- Open MS Word.
- Become to Insert > My add-ins > Store.
- Use the search bar to discover and select "Lucidchart Diagrams for Word."
- Click "Add."
- Have the terms and weather.
- Log in with your Lucidchart credentials to access your diagrams.
How to insert a decision tree into Word using the add-in
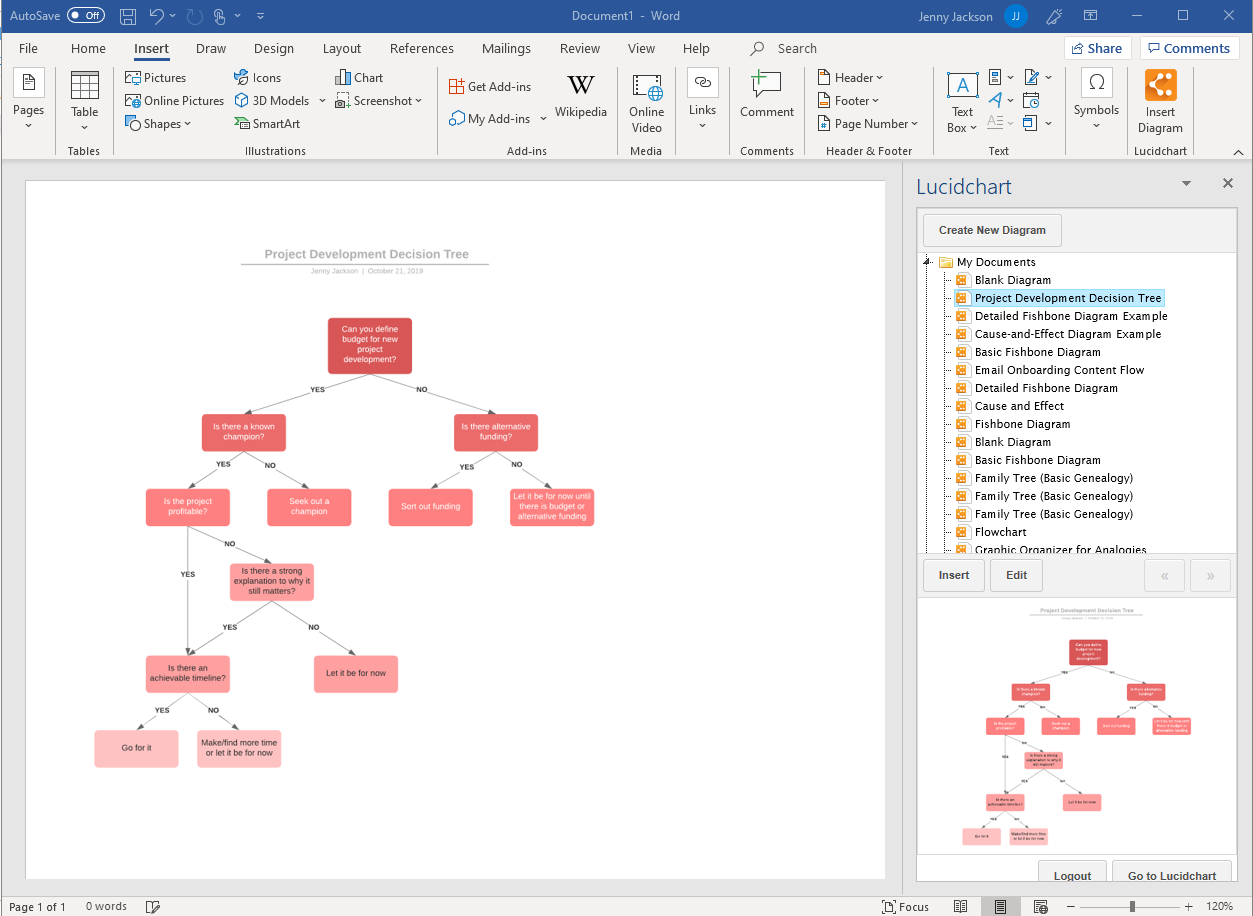
Insert your decision tree into MS Word as a high-resolution image using the Lucidchart add together-in.
- In your Word doc, notice the Lucidchart add-in in the upper-right corner.
- Click "Insert Diagram."
- Select your decision tree from the list.
- Bank check the preview. If it's the correct diagram, click "Insert."
- Select "Edit" to make changes to your decision tree in the Lucidchart editor pop-upwards window.
- Become back into Word.
- Click "Insert Diagram."
- Select your updated decision tree from the certificate list.
- Click "Insert."
- Save your Discussion Document.
How to create a determination tree in Give-and-take using the add-in
Use the Microsoft add-in to hands access the Lucidchart editor to create and edit your decision tree without leaving Word.
- In your Give-and-take certificate, select "Insert Diagram" to open the Lucidchart panel.
- Click "Create a New Diagram" at the top of the panel to open the Lucidchart editor.
- Get started with either a blank document or a template.
- Drag and driblet shapes within the Lucidchart editor to create your determination tree.
- After completing your decision tree, save it and close the editor.
- Select your new decision tree from the Lucidchart panel and then click "Insert."

For additional help installing the Lucidchart add-in, visit the Help Center or watch the video tutorial below.
Pick #ii: Make a decision tree in Word using the shape library or SmartArt
On the other mitt, you can make a decision from scratch using either the shape library or SmartArt in MS Word. Both of these options crave manually drawing and organizing lots of shapes, lines, and text in a less intuitive interface, making the unabridged procedure monotonous and time-consuming than it is in Lucidchart.
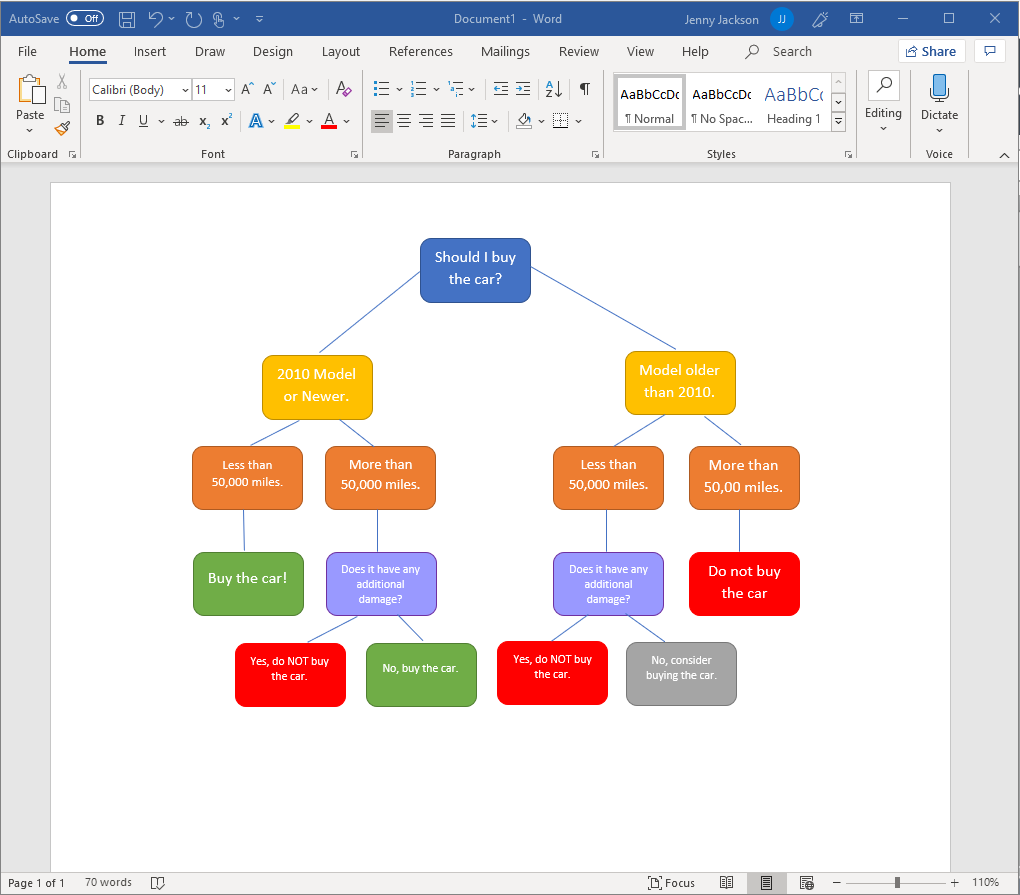
How to make a conclusion tree using the shape library in MS Word
- In your Word certificate, go to Insert > Illustrations > Shapes. A drop-down menu will announced.
- Use the shape library to add shapes and lines to build your conclusion tree.
- Add text with a text box. Go to Insert > Text > Text box. Add and move text boxes to map out your conclusion tree.
- Salvage your certificate.
How to make a determination tree using SmartArt graphics in MS Discussion
- In Discussion, go to Insert > Illustrations > SmartArt. A popular-up window will open.
- Get to "Hierarchy," select the diagram that fits your needs, and click "OK."
- Double-click "Text" to change the text or use the text pane.
- Select the graphic, and click "Add Shape" to make the decision tree bigger.
- Save the spreadsheet once you've finished your decision tree.

Why you should choose Lucidchart to create a decision tree in Discussion
At present information technology's time for you lot to brand a decision and choose the right program for y'all to create your decision tree. Simply think that diagramming in Word is messy and requires patience and time that we don't always accept to dedicate to diagraming. With Lucidchart'due south add together-in for Word, you tin create your decision tree chop-chop and easily within an intuitive interface and add it to your documents.
The option is yours. Give Lucidchart a shot and beginning diagramming your decisions today.

Source: https://www.lucidchart.com/blog/how-to-make-a-decision-tree-in-word
Posted by: mcgowanwhoust.blogspot.com
0 Response to "How To Draw Phylogenetic Tree On Word"
Post a Comment